Thursday, January 21, 2016

Simple Valentine Heart Garland


This garland is really cute, really easy and really inexpensive to make.  I seriously love all things heart-shaped which is why I have so much fun crafting during Valentine's season.  I purchased the two items needed for this at my home away from home, every moms favorite store, Target.  The hearts are actually stickers which meant this garland required no glue or tape!
So here is what you will need....

6 packages of glittered heart stickers
1 spool of red twine
(Both found in the Valentines section of Target)
Scissor


So here's how you construct it...
Take each sticker and place it towards the top of the red string.  Then, simply place another sticker on top of it.  So easy!  Each package contains four stickers so you can get two hearts out of each one.  I seriously love the way this garland came out so much that I think I'm going to go back and add some hearts so I can string it all along my son's playroom.  I'm thinking it would be super cute for a Valentine's Day photo shoot backdrop or maybe strung intertwined with some string lights!
Enjoy!


Sweet Potato and Chicken Enchiladas


I have a serious love for all things Mexican. From the home decor to their food. I'm pretty sure the decor of my next home will have tons of Mexican themed touches. I love, love how everything is just so bright and colorful, including their food. 
Seriously, who doesn't love Mexican food?!  I so just love making Mexican food. It's always really delicious, really flavorful and most of the time really easy because it requires a lot of the same basic ingredients.  And, if I must say so myself its one of the things (Unlike many others) that I normally don't screw up!  This idea came to me because, well I wanted to cook a healthy dinner and barely had anything in the house.  However, I also didn't have the enthusiasm to pack two kids in the car and head to the supermarket in the freezing cold.  So, I opened the fridge took out some chicken cutlets and grabbed the sweet potatoes off the counter (that were about to go bad) and somehow came up with the idea to make enchiladas.  Since my husband shares the same love of Mexican food with me I thought this would be perfect meal for him to come home to after a long day of work. 
So, this is my spin on semi-healthy enchiladas. They were seriously delicious. My husband and two year old son literally devoured their entire plate. The sweet potatoes gave the enchiladas a sweetness to them that you don't normally get. The most amazing part about these beauties (aside from their scrumptious taste) was that I threw it all together in about 40 minutes. 
So here's how I made them....

Ingredients
4 boneless, skinless chicken cutlets
1 1/2 jar of your favorite enchilada sauce
4 sweet potatoes
1 onion
1 can of black beans
6 large flour tortillas
1 cup of cheddar Cheese
1 cup of montery jack cheese
Fresh Cilantro
1/2 cup cherry tomatoes

Directions
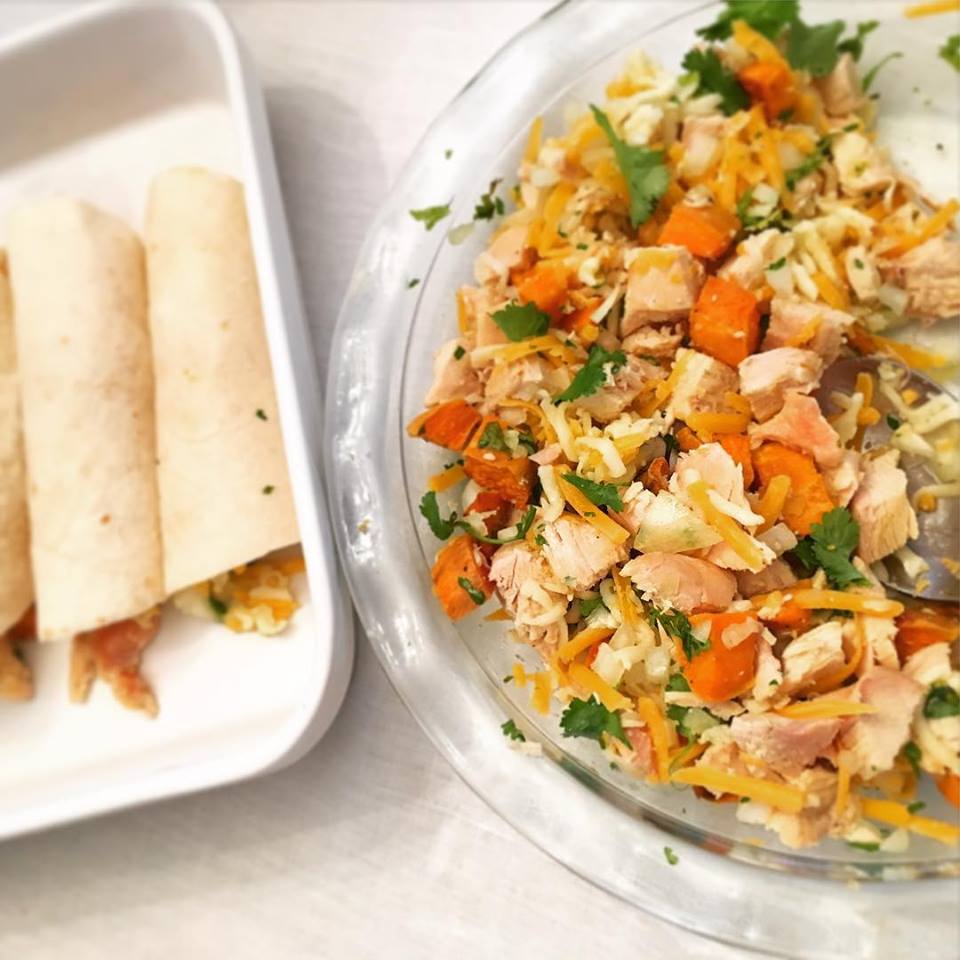
Cook the chicken in the oven with 1/4 cup of the enchilada sauce covered at 350 degrees for about 40 minutes (until chicken is fully cooked through).  In the meantime, chop your onion, peel and cut the sweet potatoes into chunks and shred all of your cheese. (The block of cheese is always better than the pre-grated). Mix the two cheese together and set aside.  Next, place the cooked chicken pieces into a large bowl and using two forks, shred the chicken. After chicken is nice and shredded, add another 1/4 cup of enchilada sauce to the chicken. Then, add beans, chopped onion, sweet potatoes, beans, cilantro (as much or as little as you'd like) and one cup of the mixed cheese into the chicken.  Mix everything together. Place a heaping scoop of the mix into the flour tortilla then roll up. Place the rolled up stuffed tortilla into a large baking pan. Continue the same with all 6 tortillas and line them up side by side so they are all touching.  Top all the rolled up tortillas with remaining 1 cup of enchilada sauce.  Then, top with remaining 1 cup (or more of you'd like) of the cheese.  Bake in the oven at 350 degrees for 30 minutes (until heated throughly and cheese is melted). Top with fresh chopped cilantro, cherry tomatoes and serve with creamy sour cream and a side of brown rice.
Enjoy! 

Sunday, January 10, 2016

Puffins! Mini baked Pancakes

So I've pinned this recipe at least ten times and kept telling myself I was going to make them for my two year old who is a pancake lover  He totally takes after me in this breakfast department.  I have a thing for pancakes.  Well, I have a thing for making pancakes, in super fun shapes.  Although I must admit, it has taken me years to perfect my pancake making abilities. Yet, still the first one of the batch always ends up in the garbage.
Anyway, these little pancake muffins looked so cute and the perfect little finger-food breakfast for my son.  I finally got around to making them this week and they were a total hit.  Bonus, they were SO much easier to make than actual pancakes.  There are a ton of recipes where you can make your own batter from scratch but most included buttermilk which I never have on hand so I decided to improvise.  I've tried SO many different pancake mixes in the past but I've finally settled on Biscuick brand.  They always give me the perfect amount of fluffiness that every pancake should have.  So thats what I used for this.  They came out super light, super fluffy and super delicious.  The best part was since they weren't fried in butter they were a lot less greasy so I didn't feel as guilty dousing it in syrup.  It ended up making about 32 muffins so I kept them in the fridge and ate them throughout the week.  They were actually even BETTER the second day when I re-heated them in the toaster.  The outside toasted up and gave it a nice little extra crunch while the inside kept its fluffiness.  I didn't try it, but Im thinking these would be a good make-a-head, freezer-friendly breakfast treat to keep on hand.
I served them with some fresh heart-shaped fruit.  (Just used a mini cookie cutter) It is Valentines Day season after all!

Here's how I made them:

Ingredients:
2 cups of Bisquick mix
1 cup of whole milk
1 tbsp pure vanilla extract
2 large eggs
2 tbsp sugar
1/2 cup of blueberries

Directions:
Mix together the Bisquick mix, whole milk, vanilla extract, sugar and two eggs.  Stir in fresh blueberries.  Pour the batter into a generously buttered muffin tin about 3/4 of the way.  You can add some additional blueberries on top if you'd like. Bake at 375 degrees for about 10-12 minutes. Enjoy!

Healthy Banana Peanut Butter Muffins


I've seen these muffins floating around Pinterest for a while now and I finally decided to give it a go.  Turns out, they were even easier than they looked to make and SO super yummy!  The best part is that everything gets thrown into a blender and then poured into mini muffin tins to be baked off.
After about 5 minutes of prep work (to measure and blend all the ingredients), the muffins headed off the the oven where they were baked off for an additional 8 minutes.  This makes the whole preparation of these little guys from start to finish, UNDER 15 minutes!  Yup thats right, under 15 minutes to yummy, healthy goodness. I doubled the batch which made 24 very plump mini muffins.  Another awesome part was that they lasted a good five days (possibly longer but I have a house full of hungry boys).  They were just as tasty on the fifth day as they were on the first!  
Ok, so here is how I made them.....

Ingredients:
1 ripe banana
1/4 tsp baking Soda
2 tbsp pure vanilla extract
1 egg
2 tbsp honey
1/4 cup of whole milk
1/2 cup of creamy peanut butter
1/2 cup mini chocolate chips
1/4 cup rolled oats
pinch of salt

Directions:
Throw everything into a blender with the exception of 3 tbsp of the mini chocolate chips.  Pour the batter into each section of a greased mini muffin tin.  Top with remaining 3 tbsp of mini chocolate chips and rolled oats.  bake at 375 degrees for 8 minutes. Enjoy!